
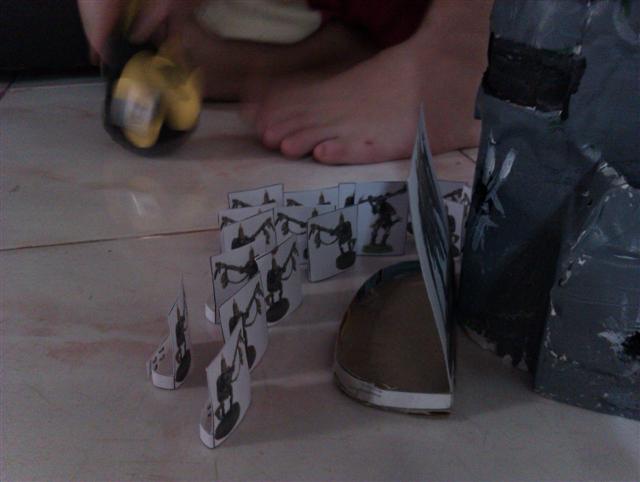
Before you view this battle report be warned, only proxies are being used. As we cannot afford to buy Games Workshop models, none of my battle reports will ever contain real Warhammer models, however you can download the printable figures used in this battle on this site.
(Note: While this is not our first game of Warhammer 40k, we are still pretty new to the game and any advice on any really bad tactical errors or rules we have broken would be appreciated :] )
Anyway, on to the battle.....
Forces:
Tau:
HQ - Ethereal with 4 Honour Guard
Troops - Fire Warrior x10
-Fire Warrior x10
-Fire Warrior x10
-Fire Warrior x10
-Kroot x18 and a Shaper
Heavy Support - Broadside x2 (With multi-tracker)
-Broadside x2 (With multi-tracker)
Tyranids:
HQ - Tervigon
Troops - Tyranid Warriors with Boneswords x10, one has a Venom Cannon - In a Mycetic Spore
- Genestealer x9
Elites - Doom of Malan'Tai in a Mycetic Spore
- Zoanthrope x3
Played on a 6x4 area of floor (we have yet to make a table) this is the battlefield:
We rolled 'Sieze Ground' on the missions chart, and deployed five objectives. One in the middle, one in front of the big factory building, in the camp, between the trees and hill and between the two bunkers: (Note: The Factory building (on the right) has a twin-linked heavy bolter and a cannon with a 36" range, strength 5, armour penetration 4 large blast template).
We rolled 'Dawn of War' on the deployment chart, and Tau took first turn. Tau deploys a squad of Fire Warriors on the middle objective and in the camp objective. Ethereal and Honour guard is deployed behind the Factory. My opponent decides to outflank his squad of Kroot.


I deploy my Tervigon next to the missile objective (near the trees and hill) and hide my Zoanthropes in the bunker, hoping to remain out of sight in the Tau shooting phase. Everything else is held in reserves as the Doom and Warriors will deepstrike while Genestealers outflank.
Tau Turn 1:
Movement:
My opponent moves his Fire Warrior Team near the camp objective closer to the middle to avoid any Genestealers that would to try outflank there. His Broadsides stroll in near the middle of his 'table' edge and take up firing positions for next turn, while two teams of Fire Warriors move in near the factory, one in front, the other behind.


His Ethereal and Honour Guard also enter the Factory to man it's guns while the Fire Warriors in the middle stay put.
Shooting:
His middle Fire Warrior squad attempt to shoot my Zoanthropes, unfortunately I forgot about the windows in the bunker which meant he he had line of sight. He passes night fighting check and puts 1 wound on my Zoanthrope squad. The Factory's gun's failed to see my Zoanthropes through the night, and all of his other squads moved, so that brings an end to his shooting phase. (If you squint really hard you can see the Zoanthropes through the window!)Assault:
Nope.
Tyranid Turn 1:
Movement:
My Tervigon spawns 11 Termagants and leaves them to hold the missile objective while she walks toward the factory. The Zoanthropes move out of the bunker (seeing as their invulnerable saves are better than the cover save they would get) and line up the middle Fire Warrior squad.

Shooting:
The Zoanthropes charge up their Warp Blast, one fails it's psycic test and another suffers Perils of the Warp (passing it's invulnerable save), but the last manages to drop it's blast square on the heads of the middle Fire Warrior squad, killing half of them.


Though slightly shaken by the loss of half their squad, the Fire Warriors pass morale and stand firm.
Assault:
My Tervigon charges the factory, destroying the cannon and leaving the Tau inside with a dreadful sinking feeling in the pits of their stomachs.

Tau Turn 2:
Movement:
The Tau Player rolls for reserves, and outflanks his Kroot next to my Tervigon. The Kroot surround my Tervigon and prepare to charge.
 The Fire Warrior squad near the front of the building moves forward and claims the Factory objective.
 My opponent moves the Fire Warrior squad behind the building to back up his Kroot.

Shooting:
With the night fading away, the Tau marksmen had a clear shot to my Zoanthropes. The middle team of Fire Warriors let fly a volley of fire to avenge their fallen comrades, which bounces harmlessly off the Zoanthropes Warp Fields. Two squads of Broadsides, another team of Fire Warriors and the Factory unleash their full firepower upon the Zoanthropes....
 Almost everything you see here shot at the Zoanthrope brood. The result...........
 "Did you feel that?" "Feel what?" "Hey! Didn't there used to be another guy behind us?" "Yeah, where'd he go?"
Assault:
With a roar, the Kroot charge my Tervigon, unleashing a full 54 attacks before the Tervigon gets a chance to blink. Fortunately her power-armour-like shell protects her, and my Tervigon doesn't take a single wound!
 In return the Kroot take a single casualty and pass their morale check.
Tyranid Turn 2:
Movement:
I roll for my reserves - The Doom of Malan'Tai and my Tyranid Warriors deepstrike between his Broadsides and the camp objective, scattering only a couple of inches. (The Tyranid Warrior's Mycetic Spore also nicely blocked one of the Broadside squad's view)


The Tervigon spawns 14 gants, who move toward the factory objective.
 I move my Zoanthrope brood up past the boxes, should they be needed for the extra firepower.

Shooting:
Six Fire Warriors and two Broadsides are killed off by the Doom's Leech Essence. (Right, that's the Doom up to max strength! :] ) The Doom's Mycetic Spore kills off another Fire Warrior and the Tyranid Warriors put 1 wound on the remaining Broadside team. At this point I decide to take a risk and shoot the Fire Warrior team (near the camp) with The Doom of Malan'tai, unfortunately it scatters and hits The Doom as well!
 Here we had a bit of an argument, can the Doom of Malan'tai survive instant death from his own shots? (Seeing as any wound he inflicts, he adds to his wounds. What's your take on this?) In the end we decided to let the dice decide, if the Doom made his save he could, if not, then bits of him go flying everywhere! Fortunately for me, the Doom shrugged it off and survived, however so did the two Fire Warriors! Unfortunately for the Tau player, the ordeal was just too much for the Fire Warriors, and despite being able to see the Ethereal they failed their morale check and fell back off the board.
Anyway, on to the battle.....
Forces:
Tau:
HQ - Ethereal with 4 Honour Guard
Troops - Fire Warrior x10
-Fire Warrior x10
-Fire Warrior x10
-Fire Warrior x10
-Kroot x18 and a Shaper
Heavy Support - Broadside x2 (With multi-tracker)
-Broadside x2 (With multi-tracker)
Tyranids:
HQ - Tervigon
Troops - Tyranid Warriors with Boneswords x10, one has a Venom Cannon - In a Mycetic Spore
- Genestealer x9
Elites - Doom of Malan'Tai in a Mycetic Spore
- Zoanthrope x3
Played on a 6x4 area of floor (we have yet to make a table) this is the battlefield:

We rolled 'Sieze Ground' on the missions chart, and deployed five objectives. One in the middle, one in front of the big factory building, in the camp, between the trees and hill and between the two bunkers:
 (Note: The Factory building (on the right) has a twin-linked heavy bolter and a cannon with a 36" range, strength 5, armour penetration 4 large blast template).
We rolled 'Dawn of War' on the deployment chart, and Tau took first turn. Tau deploys a squad of Fire Warriors on the middle objective and in the camp objective. Ethereal and Honour guard is deployed behind the Factory. My opponent decides to outflank his squad of Kroot.


I deploy my Tervigon next to the missile objective (near the trees and hill) and hide my Zoanthropes in the bunker, hoping to remain out of sight in the Tau shooting phase. Everything else is held in reserves as the Doom and Warriors will deepstrike while Genestealers outflank.

Tau Turn 1:
Movement:
My opponent moves his Fire Warrior Team near the camp objective closer to the middle to avoid any Genestealers that would to try outflank there.
 His Broadsides stroll in near the middle of his 'table' edge and take up firing positions for next turn, while two teams of Fire Warriors move in near the factory, one in front, the other behind.


His Ethereal and Honour Guard also enter the Factory to man it's guns while the Fire Warriors in the middle stay put.

Shooting:
His middle Fire Warrior squad attempt to shoot my Zoanthropes, unfortunately I forgot about the windows in the bunker which meant he he had line of sight. He passes night fighting check and puts 1 wound on my Zoanthrope squad. The Factory's gun's failed to see my Zoanthropes through the night, and all of his other squads moved, so that brings an end to his shooting phase.
 (If you squint really hard you can see the Zoanthropes through the window!)Assault:
Nope.
Tyranid Turn 1:
Movement:
My Tervigon spawns 11 Termagants and leaves them to hold the missile objective while she walks toward the factory.
 The Zoanthropes move out of the bunker (seeing as their invulnerable saves are better than the cover save they would get) and line up the middle Fire Warrior squad.
Shooting:
The Zoanthropes charge up their Warp Blast, one fails it's psycic test and another suffers Perils of the Warp (passing it's invulnerable save), but the last manages to drop it's blast square on the heads of the middle Fire Warrior squad, killing half of them.


Though slightly shaken by the loss of half their squad, the Fire Warriors pass morale and stand firm.
Assault:
My Tervigon charges the factory, destroying the cannon and leaving the Tau inside with a dreadful sinking feeling in the pits of their stomachs.

Tau Turn 2:
Movement:
The Tau Player rolls for reserves, and outflanks his Kroot next to my Tervigon. The Kroot surround my Tervigon and prepare to charge.
 The Fire Warrior squad near the front of the building moves forward and claims the Factory objective.
 My opponent moves the Fire Warrior squad behind the building to back up his Kroot.
Shooting:
With the night fading away, the Tau marksmen had a clear shot to my Zoanthropes. The middle team of Fire Warriors let fly a volley of fire to avenge their fallen comrades, which bounces harmlessly off the Zoanthropes Warp Fields. Two squads of Broadsides, another team of Fire Warriors and the Factory unleash their full firepower upon the Zoanthropes....
 Almost everything you see here shot at the Zoanthrope brood. The result...........
 "Did you feel that?" "Feel what?" "Hey! Didn't there used to be another guy behind us?" "Yeah, where'd he go?"
Assault:
With a roar, the Kroot charge my Tervigon, unleashing a full 54 attacks before the Tervigon gets a chance to blink. Fortunately her power-armour-like shell protects her, and my Tervigon doesn't take a single wound!
 In return the Kroot take a single casualty and pass their morale check.
Tyranid Turn 2:
Movement:
I roll for my reserves - The Doom of Malan'Tai and my Tyranid Warriors deepstrike between his Broadsides and the camp objective, scattering only a couple of inches. (The Tyranid Warrior's Mycetic Spore also nicely blocked one of the Broadside squad's view)


The Tervigon spawns 14 gants, who move toward the factory objective.
 I move my Zoanthrope brood up past the boxes, should they be needed for the extra firepower.
Shooting:
Six Fire Warriors and two Broadsides are killed off by the Doom's Leech Essence. (Right, that's the Doom up to max strength! :] ) The Doom's Mycetic Spore kills off another Fire Warrior and the Tyranid Warriors put 1 wound on the remaining Broadside team. At this point I decide to take a risk and shoot the Fire Warrior team (near the camp) with The Doom of Malan'tai, unfortunately it scatters and hits The Doom as well!
 Here we had a bit of an argument, can the Doom of Malan'tai survive instant death from his own shots? (Seeing as any wound he inflicts, he adds to his wounds. What's your take on this?) In the end we decided to let the dice decide, if the Doom made his save he could, if not, then bits of him go flying everywhere! Fortunately for me, the Doom shrugged it off and survived, however so did the two Fire Warriors! Unfortunately for the Tau player, the ordeal was just too much for the Fire Warriors, and despite being able to see the Ethereal they failed their morale check and fell back off the board.
 (Can you see the Ethereal? He's on the balcony of the Factory!)
Inspired by the slaughterfest in the camp corner, the Zoanthropes charged up their Warp Blast. One failed it's psychic test, however the other managed to once again score a direct hit, hitting absolutely all of the Fire Warriors at the middle objective. Unfortunately it's accuracy went to waste, only 1 Fire Warrior died from a blast that ignores their armour save!
 Lastly, I run my 14 Termagants up to contest the Factory objective.

Assault:
The battle continues near the Factory, Kroot put 4 wounds on my Tervigon and she kills 2 Kroot in retaliation, taking a further wound to 'No Retreat'.

Tau Turn 3:
Movement:
Opponent moves his Fire Warriors (near the front of the Factory) forward into line of sight of my contesting gants.
Shooting:
After moving up, the Fire Warrior squad rapid-fires on my contesting Termagant brood, killing all but 3 of them. The remaining gants manage to keep it together though and pass their morale (as they are out of synapse now).
 The last Broadside team fires on the Tyranid Warriors, their missiles have no effect however two Warriors are completely vapourised by Railguns.
 Still holding fast to their objective, the middle Fire Warrior team continues to rain fire upon the Zoanthropes, managing to inflict a single wound. The Factory gunners lend a hand and inflict another wound with their twin-linked Heavy Bolter, reducing the brood to a single Zoanthrope.
 "Why am I all alone all of a sudden?!"
Assault:
The Kroot finally bring down my Tervigon, and try to consolidate out of range of my Termagant's fleshborers.

Tyranid Turn 3:
Movement:
I roll for my reserves, and my Genestealers don't arrive! (I could have used them this turn!) I surround the remaining Broadsides with my Warriors and move the Doom of Malan'tai forward.

Shooting:
The Broadsides are just out of range of he Doom's Leech Essence, my Tyranid Warriors focus their fire and kill 1 of the broadsides, who passes his morale check.

 Lastly, I run my 14 Termagants up to contest the Factory objective.
Assault:
The battle continues near the Factory, Kroot put 4 wounds on my Tervigon and she kills 2 Kroot in retaliation, taking a further wound to 'No Retreat'.

Tau Turn 3:
Movement:
Opponent moves his Fire Warriors (near the front of the Factory) forward into line of sight of my contesting gants.
Shooting:
After moving up, the Fire Warrior squad rapid-fires on my contesting Termagant brood, killing all but 3 of them. The remaining gants manage to keep it together though and pass their morale (as they are out of synapse now).
 The last Broadside team fires on the Tyranid Warriors, their missiles have no effect however two Warriors are completely vapourised by Railguns.
 Still holding fast to their objective, the middle Fire Warrior team continues to rain fire upon the Zoanthropes, managing to inflict a single wound. The Factory gunners lend a hand and inflict another wound with their twin-linked Heavy Bolter, reducing the brood to a single Zoanthrope.
 "Why am I all alone all of a sudden?!"
Assault:
The Kroot finally bring down my Tervigon, and try to consolidate out of range of my Termagant's fleshborers.

Tyranid Turn 3:
Movement:
I roll for my reserves, and my Genestealers don't arrive! (I could have used them this turn!) I surround the remaining Broadsides with my Warriors and move the Doom of Malan'tai forward.

Shooting:
The Broadsides are just out of range of he Doom's Leech Essence, my Tyranid Warriors focus their fire and kill 1 of the broadsides, who passes his morale check.

The lone Zoanthrope Warp Blasts the middle Fire Warrior team, however it's usually unerring accuracy fails and it completely misses! The Doom of Malan'Tai comes to it's aid, however the unaccuracy seems to be infectious and The Doom's large blast template hits and kills only 1 Fire Warrior, losing more wounds than he gains from killing him!
Near the missile objective, the Tau player had misjudged the range of the Fleshborer, leaving his Kroot in range of 7 Termagants, who promptly fired and killed 4 Kroot. (Who then pass their morale check).
Assault:
I charge the Tyranid Warriors into combat with the last Broadside, killing him before he has a chance to fall back. I then consolidate toward the Factory (just outside of the Twin-linked Heavy Bolter's arc of fire).

Tau Turn 4:
Movement:
Seeing The Doom coming, the Ethereal and Honour Guard evacuate the Factory. My opponent then moves his Fire Warriors away from the Factory objective, trying to get into the Factory, though he can't move close enough to the door.
 The Kroot move forward towards the missile objective.
 At this point my opponent remembers he still has a whole squad of Fire Warriors hidden behind the factory. He moves them into the doorway and garrisons the Factory.

Shooting:
Kroot run to take the objective while the Fire Warrior team in front of the Factory and Honour Guard both fire at the Termagants holding the missile objective, killing 9 between them. Scared without their Mummy nearby, the Termagants fail morale and fall back.


Stubbornly holding their ground, the remaining Fire Warriors on the middle objective shoot and kill the last Zoanthrope, successfully avenging their fallen brethren.
Tyranid Turn 4:
Movement:
I roll for my reserves, and finally my genestealers arrive! They outflank near the camp objective, and I move them up to try and claim it, however they are too far away this turn.
 My Termagants fall back, almost going off the board!
 I move my Tyranid Warriors toward the Factory, remaining out of the Heavy Bolter's arc of fire. The Doom of Malan'Tai moves closer to the middle objective.
Shooting:
The Doom of Malan'Tai shoots the middle Fire Warrior squad, reducing it to two warriors. After all they'd been through, the middle squad had finally had enough, they failed their morale (Ethereal was no longer in sight) and fell back between my Mycetic Spore and Tyranid Warriors.


As a last act of vengeance, my two Termagants fired at the Kroot, killing one between them.

Tau Turn 5:
Movement:
The middle Fire Warrior team continues to fall back between my Warriors and Spore, he moves his Kroot up to get well and truly in range of my fleeing Termagants.

Shooting:
In a final, desperate volley, the falling back Fire Warrior team kill 1 of my Tyranid Warriors.
 The Kroot near the missile objective eradicate the last of my Termagants.

Tyranid Turn 5:
Movement:
I move my Tyranid Warriors up to the Factory wall, hoping to take cover from the Fire Warrior Squad out the front (until The Doom of Malan'Tai 'takes care of them').
 The Doom of Malan'Tai resumes it's slow advance toward the Factory.
Shooting:
My Tyranid Warriors turn around and shoot at the falling back Fire Warriors, however their weapons have no effect. The Mycetic Spore joins in and manages to kill one.
 My Doom of Malan'Tai fires upon the squad in front of the Factory.
 He manages to kill off six of them, thus restoring himself back to his full strength. The Fire Warrior team passes their morale check and stands firm.

We roll a 3 and the game continues to Turn 6.
Tau Turn 6:
Movement:
My opponent abandons the Factory and charges his Fire Warriors up towards my Tyranid Warriors.
 My opponent squeezes his six man Fire Warrior squad in between the objective and the Factory, contesting it.

Shooting:
The Fire Warriors out the back of the Factory rapid-fire at my Warriors, killing two of them.
 The Ethereal and his Guard run behind the Factory.

Tyranid Turn 6:
Movement:
I move my Warriors a bit closer to the objective and move the Doom of Malan'Tai forward.
Shooting:
The Doom of Malan'Tai attempts to blow up the remainder of the Fire Warrior squad (in front of the factory), however instead it suffers a Perils of the Warp attack! Luckily passing it's invulnerable save.
 The Tyranid Warrior with Venom Cannon shoots at the contesting Fire Warrior team, and kills two of them. They fail their morale check and fall back, however are still contesting the objective.

Current score, Tau: 1 - Tyranids: 1. I hold the camp objective, my enemy holds the missile objective and we are contesting the Factory objective, if the game ends now it will be a tactical draw. We roll a 5 and the game continues to Turn 7.
Tau Turn 7:
Movement:
Running out of options, my opponent moves his last full-strength Fire Warrior team further out from behind the building.
 His contesting Fire Warrior squad falls back and relinquishes the Factory objective to me!
 He also moves his Ethereal completely behind the Factory.
Shooting:
The full-strength squad of Fire Warriors rapid-fire my Tyranid Warriors, only killing one. The falling back Fire Warrior also rapid-fires, but it has no effect.
 He runs his Ethereal in front of the Factory back door, sort of pointless at this stage of the game, but I guess it's the thought that counts!
Tyranid Turn 7:
Movement:
My Doom of Malan'Tai moves towards the missile objective. I don't bother with anything else, I've got this game!
Shooting:
My Doom of Malan'Tai drops his large blast template ontop of the squad of Kroot at the missile objective in an attempt to make them fall back away from the objective. It scores a direct hit!
 It manages to kill 6 Kroot, however with the Shaper still around they pass their morale test and claim the objective!

End of game. I hold the camp and Factory objective, while my opponent holds the missile objective. Scores are Tau: 1 - Tyranids: 2.
This was a tough game to start with, I was a little concerned as for the first time I was the one that was outnumbered! However once The Doom and my Tyranid Warriors arrived it just turned into a slaughterfest! My Zoanthropes held the attention of the middle Fire Warrior squad for the majority of the game, though I was disappointed that 3 Zoanthropes couldn't manage to outshoot a squad of Fire Warriors between them! (In my opinion that last surviving Fire Warrior from the middle squad needs a promotion!) My main concern was the Broadside team, as they had the capabilities to instant-kill pretty much any model they pleased, it was a relief to take care of them relatively early in the game. Also, for the first time in history I was able to spawn more than 1 squad of Termagants with my Tervigon, though the second squad wasn't really much more than a distraction.
Personally I think that my opponent made a big mistake taking his Fire Warriors out of the building. He evacuated them in fear of the Doom blowing it up, but either way I think they would have been of more use in the building than outside!
In my opinion it was a pretty close game, I only pulled off a victory by 1 point and there weren't really many 'nids left on the battlefield!
Map overview at the end of the game:

Near the missile objective, the Tau player had misjudged the range of the Fleshborer, leaving his Kroot in range of 7 Termagants, who promptly fired and killed 4 Kroot. (Who then pass their morale check).
Assault:
I charge the Tyranid Warriors into combat with the last Broadside, killing him before he has a chance to fall back. I then consolidate toward the Factory (just outside of the Twin-linked Heavy Bolter's arc of fire).


Tau Turn 4:
Movement:
Seeing The Doom coming, the Ethereal and Honour Guard evacuate the Factory.
 My opponent then moves his Fire Warriors away from the Factory objective, trying to get into the Factory, though he can't move close enough to the door.
 The Kroot move forward towards the missile objective.
 At this point my opponent remembers he still has a whole squad of Fire Warriors hidden behind the factory. He moves them into the doorway and garrisons the Factory.
Shooting:
Kroot run to take the objective while the Fire Warrior team in front of the Factory and Honour Guard both fire at the Termagants holding the missile objective, killing 9 between them. Scared without their Mummy nearby, the Termagants fail morale and fall back.


Stubbornly holding their ground, the remaining Fire Warriors on the middle objective shoot and kill the last Zoanthrope, successfully avenging their fallen brethren.
Tyranid Turn 4:
Movement:
I roll for my reserves, and finally my genestealers arrive! They outflank near the camp objective, and I move them up to try and claim it, however they are too far away this turn.
 My Termagants fall back, almost going off the board!
 I move my Tyranid Warriors toward the Factory, remaining out of the Heavy Bolter's arc of fire. The Doom of Malan'Tai moves closer to the middle objective.
Shooting:
The Doom of Malan'Tai shoots the middle Fire Warrior squad, reducing it to two warriors. After all they'd been through, the middle squad had finally had enough, they failed their morale (Ethereal was no longer in sight) and fell back between my Mycetic Spore and Tyranid Warriors.


As a last act of vengeance, my two Termagants fired at the Kroot, killing one between them.

Tau Turn 5:
Movement:
The middle Fire Warrior team continues to fall back between my Warriors and Spore, he moves his Kroot up to get well and truly in range of my fleeing Termagants.

Shooting:
In a final, desperate volley, the falling back Fire Warrior team kill 1 of my Tyranid Warriors.
 The Kroot near the missile objective eradicate the last of my Termagants.
Tyranid Turn 5:
Movement:
I move my Tyranid Warriors up to the Factory wall, hoping to take cover from the Fire Warrior Squad out the front (until The Doom of Malan'Tai 'takes care of them').
 The Doom of Malan'Tai resumes it's slow advance toward the Factory.
Shooting:
My Tyranid Warriors turn around and shoot at the falling back Fire Warriors, however their weapons have no effect. The Mycetic Spore joins in and manages to kill one.
 My Doom of Malan'Tai fires upon the squad in front of the Factory.
 He manages to kill off six of them, thus restoring himself back to his full strength. The Fire Warrior team passes their morale check and stands firm.
We roll a 3 and the game continues to Turn 6.
Tau Turn 6:
Movement:
My opponent abandons the Factory and charges his Fire Warriors up towards my Tyranid Warriors.
 My opponent squeezes his six man Fire Warrior squad in between the objective and the Factory, contesting it.
Shooting:
The Fire Warriors out the back of the Factory rapid-fire at my Warriors, killing two of them.
 The Ethereal and his Guard run behind the Factory.
Tyranid Turn 6:
Movement:
I move my Warriors a bit closer to the objective and move the Doom of Malan'Tai forward.
Shooting:
The Doom of Malan'Tai attempts to blow up the remainder of the Fire Warrior squad (in front of the factory), however instead it suffers a Perils of the Warp attack! Luckily passing it's invulnerable save.
 The Tyranid Warrior with Venom Cannon shoots at the contesting Fire Warrior team, and kills two of them. They fail their morale check and fall back, however are still contesting the objective.
Current score, Tau: 1 - Tyranids: 1. I hold the camp objective, my enemy holds the missile objective and we are contesting the Factory objective, if the game ends now it will be a tactical draw. We roll a 5 and the game continues to Turn 7.
Tau Turn 7:
Movement:
Running out of options, my opponent moves his last full-strength Fire Warrior team further out from behind the building.
 His contesting Fire Warrior squad falls back and relinquishes the Factory objective to me!
 He also moves his Ethereal completely behind the Factory.
Shooting:
The full-strength squad of Fire Warriors rapid-fire my Tyranid Warriors, only killing one. The falling back Fire Warrior also rapid-fires, but it has no effect.
 He runs his Ethereal in front of the Factory back door, sort of pointless at this stage of the game, but I guess it's the thought that counts!
Tyranid Turn 7:
Movement:
My Doom of Malan'Tai moves towards the missile objective. I don't bother with anything else, I've got this game!
Shooting:
My Doom of Malan'Tai drops his large blast template ontop of the squad of Kroot at the missile objective in an attempt to make them fall back away from the objective. It scores a direct hit!
 It manages to kill 6 Kroot, however with the Shaper still around they pass their morale test and claim the objective!
End of game. I hold the camp and Factory objective, while my opponent holds the missile objective. Scores are Tau: 1 - Tyranids: 2.
This was a tough game to start with, I was a little concerned as for the first time I was the one that was outnumbered! However once The Doom and my Tyranid Warriors arrived it just turned into a slaughterfest! My Zoanthropes held the attention of the middle Fire Warrior squad for the majority of the game, though I was disappointed that 3 Zoanthropes couldn't manage to outshoot a squad of Fire Warriors between them! (In my opinion that last surviving Fire Warrior from the middle squad needs a promotion!) My main concern was the Broadside team, as they had the capabilities to instant-kill pretty much any model they pleased, it was a relief to take care of them relatively early in the game. Also, for the first time in history I was able to spawn more than 1 squad of Termagants with my Tervigon, though the second squad wasn't really much more than a distraction.
Personally I think that my opponent made a big mistake taking his Fire Warriors out of the building. He evacuated them in fear of the Doom blowing it up, but either way I think they would have been of more use in the building than outside!
In my opinion it was a pretty close game, I only pulled off a victory by 1 point and there weren't really many 'nids left on the battlefield!
Map overview at the end of the game:

Victory to the Tyranids!
There you have it, 40,000 Pirates first battle report! I hope you enjoyed it, as I certainly enjoyed playing and writing it up! Please, feel free to comment with your opinion and any rules or tactical oppurtunities we may have missed.
40k Pirate
All associated marks, names, races, race insignia, characters, vehicles, locations, units, illustrations and images from the Warhammer 40,000 universe are either
®, TM and/or © Copyright Games Workshop Ltd 2000-2012, variably
registered in the UK and other countries around the world. Used without
permission. No challenge to their status intended. All Rights Reserved
to their respective owners.
No comments:
Post a Comment