
In this post I will show you how to make a Chimera Armoured Transport.
This is what I'm aiming for. This particular Chimera was scratch built from paper by the original creator of the template on http://www.bile40k.cjb.net (Unfortunately this website no longer exists). A pretty high standard, but worth a shot.

(Note: Since this tutorial was written, the general details and back 'structure' of the Chimera have been revisited. Please see this post if you're interested in adding a little extra detail to your Chimera).
For this project you will need:
-PaperHammer 40k.rar (Credit to the Golden Bolter Society)
-Paper and/or cardboard (about cereal box thickness)
-Scissors
-Paper glue (super glue is a good alternate for the less patient among us and dries very, very strong)
-Straight objects such as match sticks, tooth picks, lollipop sticks, ect.
1- Open PaperHammer 40k.rar
*Navigate to PaperHammer 40k/Imperial Guard\Chimera.
*Print Chimera - Parts.pdf on the thickest paper your printer can handle.
2- We will start with the Chimera's left track on page 1. First, cut out 1 and 2. (I also backed these on cereal boxes for added strength)
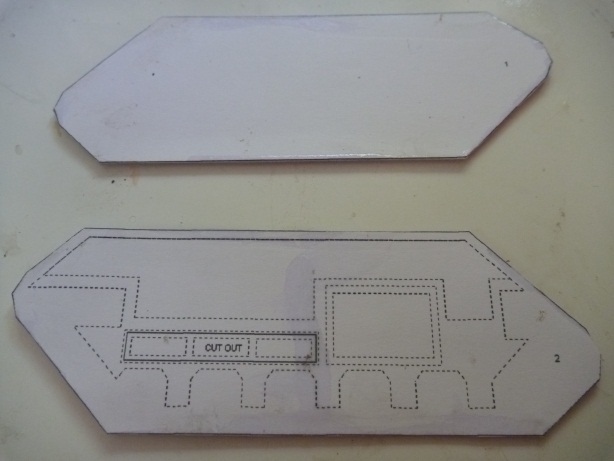
-Then cut out the small windows on 2.

-Cut out 3, then fold the tabs down, away from you so that the black lines are still visible. Join the smaller side tabs to create a triangular shape.


-Glue the hollow side onto the back of 2 behind the windows.


-Cut out 4a and fold it down, away from you. This goes around the bottom and back of either 1 or 2 (as you can see, I glued it to the back of 2).


-Cut out 4b and fold like 4a. This goes along the top and front of the Chimera track and joins with 4a.

-Now close the gap with the other piece (for me this was piece 1) and you should have the basic shape of a Chimera track.

-You've got your basic shape, but now it's time to add some detail. Cut out the structure below 1 and 2 and stick it to the track as shown. (I stuck the structure to cereal box cardboard for added thickness)


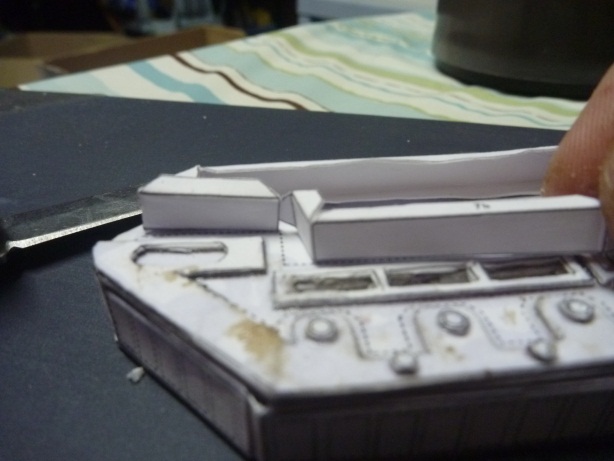
-For the 'box' on the side, cut out 7a and fold the tabs down, away from you. Stick this along the dotted lines at the top of the track.


-The bottom of the 'box' is a little trickier. Cut out 7b. Fold the small triangle on the end upward, towards you.

-Working your way from left to right, fold the next two tabs down, opposite to the way you folded the first tab.

-Now continue and fold the next two tabs upward.


-Fold the next tab upward and the last two down. Then stick 7b along the dotted lines at the bottom of the 'box'.

-To finish it off close the gap with 8, then glue on the structure. Depending on your scratch building skills, you may need to trim the outside edges a bit.

-The only thing our track is missing now is the tracks themselves! In my opinion this is the most time intensive part of the whole project, but if done right it can look really good. First you need to cut out the larger rectangles, and glue each individual one in the dotted lines.

-Now cut out the smaller rectangles and use them to bridge the gaps between the larger rectangles.

3- Repeat for the right track. (You may want to mark the finished track so you don't get the left and right tracks confused later on)
4- Next we'll make the turret and heavy bolter. Cut out the piece near the bottom left of page 3 (assuming you are holding it landscape, and the right way up!). This is the main turret piece. Fold the two largest tabs down so they are parallel to each other.

-Now fold the arms around to close the gap.

-Cut out the hatch and structure. This can be found next to the main turrent piece. Glue it to the turret as shown.

-Cut out this piece.......

.......and glue it to the turret.

-There is no template for the multilaser, you could however scratch build it out of paper tubes or other tube-like material. (For example- a chop-stick!) We will now move on to the heavy bolter. On page 3 it is next to the main turret piece, cut it out and fold the tabs down, away from you.

-By folding the larger tabs down, and closing the gaps with the smaller tabs it will create a triangular/pyramid shape.

-Use one of the small rectangles left over from the hatch on the main turret piece and glue it to the top of the bolter as a sight. You can make a barrel by rolling a piece of paper into a cylinder. (I forgot to take a picture of the WIP barrel)

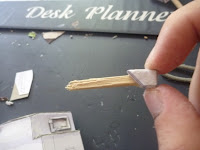
-I have decided to give this Chimera moveable and removable
weapons, this way weapon destroyed results can be easily recorded. To do this I
am simply going to glue a stick to the bottom of the turret and heavy bolter,
and cut a slot in the Chimera where they should go.


5- We've got the turret and heavy bolter, now we need something to attach them to. Cut out 12a and 12b. 12a is the bottom of the Chimera. Fold the tabs down as usual, then turn it upside down. (I glued cardboard in the middle for added support)

-Cut out 12b, this is the top of the Chimera. Cut along this line on each side:

-Then fold down.

-Now glue the back tabs (the rightmost tabs in the above photo) on to the back of 12a.


-On the front of 12b cut all the way along this line and fold down.

-This is a convenient time to add holes where you want your turret and heavy bolter. (I forgot to add the heavy bolter slot at this point, doing it later on instead)

-Now join these two tabs to the front of 12a.


-If all has went well, you should end up with something like this:

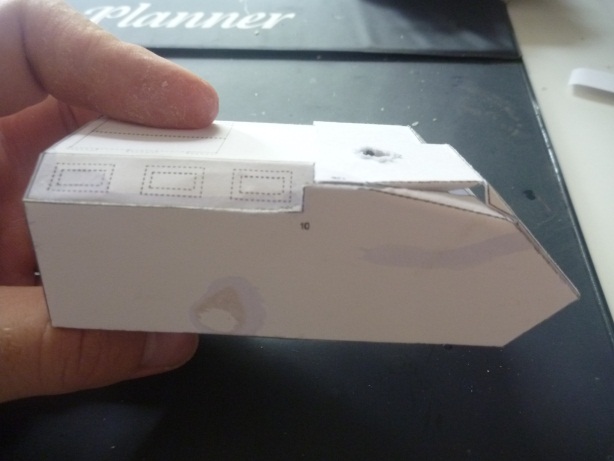
-To complete the main structure of the body you need to cut out 10 and 11. (I backed these on cereal box for extra strength) These go on the sides to close the gap. (10 goes on the Chimera's right side, 11 on it's left) On each you also need to fold the triangles down, this covers the gap between the covering piece and main body.

-You may be left with a gap like this:

-To cover this gap, cut out the triangles located next to 12b on page 3. One of these will fit snugly into the gap. (There is one for each side)

-You may also be left with gaps like these. There is no template provided to cover these gaps, but it is easy enough to trim a piece of paper to the appropriate size.

6- We've built the main hull, now to add detail! Cut out this piece (including the inside):

-Glue it around the heavy bolter spot (I had a little trouble with my piece self destructing)

-You will need to cover this gap.

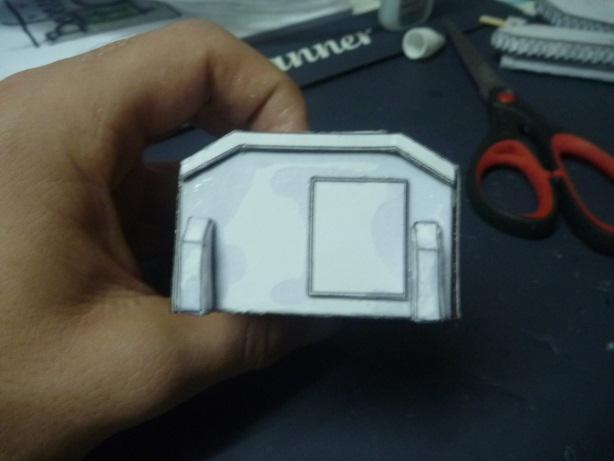
-Now we will do the front structure. Cut out this:

-And stick it to the front as pictured.
-Then cut out the pieces that can be found below the front section of 12b and glue to the front of the hull as pictured.

-That's the basic front detailing finished. We will now do the middle. Cut out the 'top doors' (remembering to cut out the small middle strip) and the windows:

-And glue them onto the top side of the Chimera as pictured:


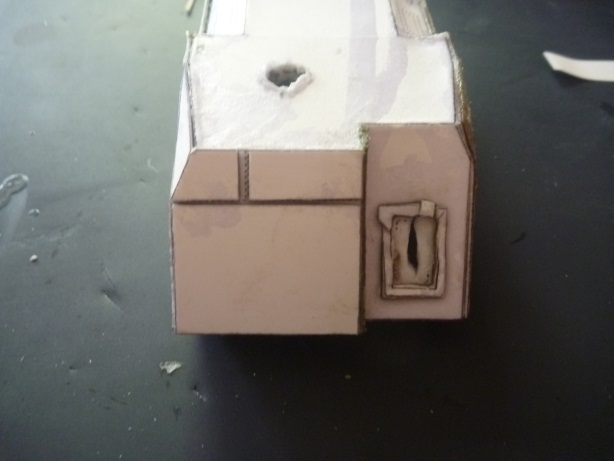
-Finally we have the back structure. On page 3 it is next to 12a on the left (assuming you are holding the sheet landscape). Cut it out and glue it in the dotted lines.
(Note: Since writing this tutorial the general details and back 'structure' of the Chimera have been revisited. Please see this post if you're interested in adding a little extra detail to your Chimera).

-Cut out the two shapes in the top left of page 3.

-Fold the tabs down, away from you. This should result in you folding the template around the far right tabs, giving you a rectangle with one sloped end.

-Then glue these on to the back of the Chimera and the main body is fully completed!
7- Now it's time to put all the pieces together, glue your tracks onto the Chimera's main body. This can be a little tricky to get just right (I think mine is definitely a little off).

8- Lastly, our Chimera is still lacking in one thing. Colour! But we can fix that!
.jpg)
And viola! that is how to scratch build a Chimera!
Looking back, there are some things which I could have done better, (the 'box' on the side for example. I just couldn't get it into quite the right shape!) but I'm pretty pleased with how this one turned out. I personally think that the posable and removable weapons are very cool! All my other scratch built vehicles have their weapons glued in place, and to me it just seemed wrong that they couldn't rotate. I'm also very impressed with the new metallic paints! I'm very new when it comes to painting and this paint just blew me away! (All this time I thought people were using some seriously complicated painting technique to achieve that metallic effect, turns out the secret is in the paint!) Now that I've got these new paints I may have to go back and redo my Broadside....
I hope you found this tutorial helpful,
Happy scratch building,
40k Pirate
All associated marks, names, races, race insignia, characters, vehicles, locations, units, illustrations and images from the Warhammer 40,000 universe are either ®, TM and/or © Copyright Games Workshop Ltd 2000-2012, variably registered in the UK and other countries around the world. Used without permission. No challenge to their status intended. All Rights Reserved to their respective owners.