Setting up for a game of 40k last weekend I found myself fretting over terrain more than usual. Nothing seemed right. It all seemed so boring, there was nothing to make the battlefield unique and exciting. Stepping back and looking at our small inventory of terrain I saw the problem, it was the terrain itself! With only a couple of sad, unpainted cardboard buildings, an assortment of craters and a small pile of green plastic crates, there wasn't a lot of variety.
At that (and with the onset of the holiday) I decided to make a river, and not just any river, a
big river! In this post I will show you the relatively simple way to make a paper mache river.
For this project you will need:
-A sheet of thick cardboard or plywood
-Stickytape or glue
-Latex glue, clear drying varnish or PVA glue
-Flour
-Water
-Lots of scrap paper!
-Paint (and related accessories)
1- First of all you need a base. For anything about 12 inches long I find thick cardboard does the job fine, however I'm making my river in 4 foot and 2 foot lengths, (this way you could choose to have a river running parallel to either table edge) so I used 3mm thick plywood (in hindsight, it would have been better if it were a little thicker). On your base you need to draw the general shape of the river banks.
-Cut a sheet of thick cardboard to the shape of each bank and stick it to the base. It is not important for the cardboard to be firmly stuck in place, as the paper mache will secure it later.
-Now add another layer of cardboard, this one a little thinner than the last. You could continue adding cardboard for taller or steeper banks, but I think two layers is plenty. You now have the basic structure for your river.

2- There are many methods for making paper mache, and it really comes down to a matter of preference, I mix about 3 cups of flour to 4 or 5 cups of water (with about 3 tablespoons of salt to try and prevent mold). If you boil the paper mache it will thicken up nicely, but I have recently read that unboiled mache is actually stronger. (Though I don't know whether this is actually true....)
Once the mache is ready it's time to put those skills you learned in kindergarten to good use! Tear the paper into strips, soak it in mache and place in on the base, remembering to overlap the edges of each strip.

-Once the first layer is finished it is best to wait for a couple of hours before applying the next layer. Continue until you have applied 3 or more layers, more layers = more strength.

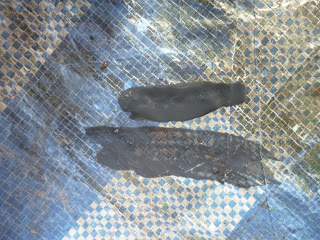
Half of the second layer done.
When applying pape mache to
anything, chances are it will bend as it dries, and even with a plywood base the river was bending upwards terribly! Here are the ways we found to reduce and/or stop it from doing this:
*Apply the same amount of paper mache to the back (can still bend)
*Cut along the paper mache, flatten the terrain and fill the cracks with latex or rubbery glue.
*If the paper mache is only bending during warmer parts of the day, seal it with spray paint while it is flat (though this could result in moisture being trapped inside, promoting mould growth and essentially rotting it from the inside out)
*Smaller pieces of terrain based on thick enough cardboard will not bend if you only apply one layer of paper mache to them. This
may work on larger projects, but there's no guarantees!
3- Once the paper mache is dry you can texturize the banks. Most people would use flock or specialised modeling sand for this job, however for the 'budget-aware' (like myself) I find sand or even dirt works fine - so long as you can find some that is fine enough for the job.
Texturizing is a simple enough process, you just need to spread your glue-of-choice thickly on the area, then apply sand.

-When using dirt to texturize a piece of terrain, I find that it rarely sticks completely at first. To avoid pieces of dirt coming off in your house I mix
a lot of glue into water, then liberally brush it over the dirt while it is still drying.

4- There's the structure of the river completely finished - all that's left is paint. Now, I'm not the world's greatest painter, but for those that just want their models painted to a bearable, 'table-top' standard I'll show you how I painted mine.
First I base coated the river sections completely black, top and bottom, with spray paint. Then a liberal coat of green was applied to the banks. It's best to cover the banks and water with paper, along with anything else you don't want to become green!


-This was followed by spraying a far lighter green over the top, from about 15 - 30cm away in a random, 'splotchy' pattern.

-Next, heavily drybrush the banks a brownish colour of your choice. Also paint out from the banks a little to give the water something to run into.

-If you're like me and using dirt/sand you found on the ground for grass, then chances are some larger pebbles will have slipped into the mix. At this stage it would be a good idea to pick them out, painting them brown and drybrushing the immediate area brown as well. This also helps break up the solid green of the grass.

-Now use the same paint and mix it with water to make a wash. The paint has to be watered down
a lot, taking on the appearance of muddy water.

-Spread the wash thickly over the banks and grass, very, very thickly - drown the thing! The wash generally will dry more clear than you think, and you may have to apply several layers of wash to get the desired effect. The aim here is to make the grass look less plastic-army-men-green, and more natural, and make the banks look muddier. Wipe off any excess paint with a paper towell.

-Once a couple of layers are dry it should look something like this:

5-To paint the water section, apply a coat of dark blue (or green, or brown, or whatever colour your water is going to be).

-Then, using a dark, similar colour, create a wash and paint over the first layer.....

...which should look something like this when dry:

-Once the wash is dry, paint along the banks with a lighter, slightly watered down colour. For the best effect use several layers, with the first layer starting close to the bank, painting other layers over the first and further in towards the centre of the river.


-You may want to finish off the shallow water with a small strip of lighter colour close to the banks.

-A darker wash can be used to further blend the colours.

-Now for the finer details. A drybrush of much lighter brown on the banks, followed by small touches of white near the edges of the river and you can put away the paints.


-All that's left is to make the river look wet. For this you could use latex glue, clear-drying varnish or PVA glue. Though I can't stress enough, test it before you slop it all over your river! The brand of latex glue I used dried clear initially, however after a day it began clouding up, to the point where you could barely see the painted river underneath!


Well there you have it! That is how you scratch build a piece of river terrain. Note that this paper mache technique can be used to make pretty much any landscape you want - hills, lakes, craters, swamps, canyons, anything!
I hope you found this tutorial useful,
Happy scratch building,
40k Pirate

.JPG)
.jpg)
.jpg)
.jpg)
.jpg)
.jpg)
.JPG)
.jpg)
.JPG)
.jpg)
.JPG)
.jpg)
.JPG)
.jpg)
.JPG)
.jpg)
.JPG)

.JPG)
.JPG)
.JPG)
.JPG)
.JPG)


