Welcome

Have you ever wanted to get a new wargaming miniature but didn't have the money to pay for it? Do you know about miniature wargaming but aren't willing to break the bank to play? Or have you been wanting to try a new army build or race with minimal impact on your wallet? If so, then you've come to the right place!
Here at 40,000 Pirates you can find printable proxies, scatter dice, blast and flamer templates for use in one of the most popular tabletop wargames - absolutely free!

Tuesday, July 31, 2012

Scratch Built Thunderfire Cannon

With a friend's birthday fast approaching, I've been doing some serious thinking about what to get our resident Space Marine player. After checking the GW site, official models are most certainly out, so it's down to scratch building.

This isn't going to be so much of a tutorial as a series of WIP pics, as there is no real template to follow and I haven't got an idea what I'm doing!


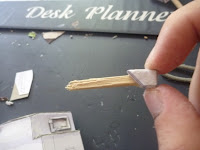
1- I started with what seemed logical, the barrel. While I don't mind the 'multi-barrel' look of the official Thunderfire, I wanted something that would scream cannon! Rummaging through the bits and pieces in my desk drawer I found an old super glue lid that looked like it could make a good barrel with a bit of modification...


-I then glued a piece of cereal box cardboard around the rim.


-I found a piece of plastic I ripped off a dead computer which looks awfully similar to a sight, combined with a hexagon from a failed Predator turret and we have the basic shape of the cannon and main body. (Hexagon can be found in Predator Mk II - Part 01 of 01.gif in PaperHammer 40k.rar. Click on the 'Scratch Build Templates' link in the right sidebar or in the resources page.)


2- For the tracks I took the rhino tracks in 'Rhino MK II.pdf' and scaled them down to about 33%, backing them on cardboard for thickness.


-I then folded these into a circular shape to form two wheels...


-...and added details


3- With the tracks completed, I moved on to the piece that would join the cannon and tracks. Once again salvaging a piece from an old predator (it can be found on the same page as the hexagon), I extended it by adding a sloped front.


-I will use the end of a chopstick to attach the cannon to the above piece.


4- At this point I ran into a problem. I had not anticipated the amount of weight at the front, so the cannon tended to lean forward, lifting the back tracks off the ground. (It doesn't show very well in this photo, but the cannon was very unstable!)


-To try and put more weight over the back, I made two 'stabilisers' with a toothpick and some carboard.


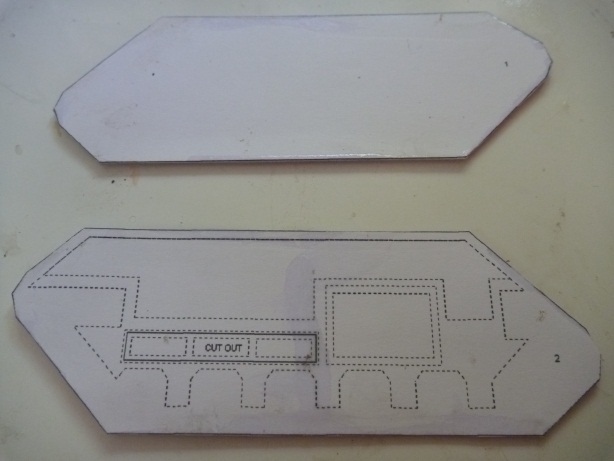
5- Next I made the armour plating using the template below:


(NOTE: The bottom left of the template was trimmed to give the armour more of an angle.)

-A couple of Imperial symbols for decoration:


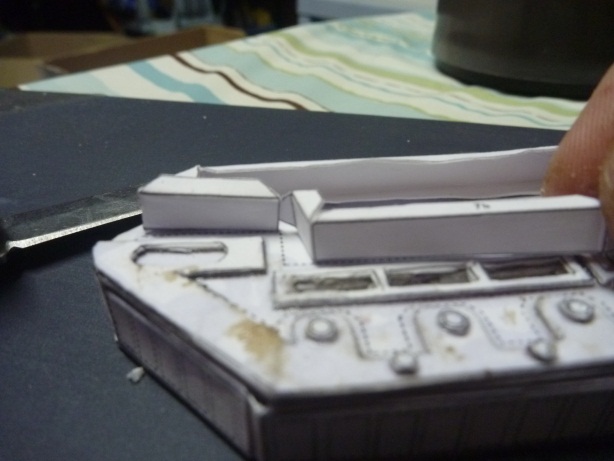
6- Now there is one thing missing, a way for the Techmarine to control his Thunderfire Cannon. I made the control panel out of a toothpick and some cardboard.


-Attached to the Thunderfire using yet another toothpick:


-A few minor details here and there, and it is done!


The Thunderfire was then basecoated and given away, so it is unlikely we will see a picture of the finished model.


All associated marks, names, races, race insignia, characters, vehicles, locations, units, illustrations and images from the Warhammer 40,000 universe are either ®, TM and/or © Copyright Games Workshop Ltd 2000-2012, variably registered in the UK and other countries around the world. Used without permission. No challenge to their status intended. All Rights Reserved to their respective owners.

Tuesday, July 17, 2012

How to Scratch Build a River

Setting up for a game of 40k last weekend I found myself fretting over terrain more than usual. Nothing seemed right. It all seemed so boring, there was nothing to make the battlefield unique and exciting. Stepping back and looking at our small inventory of terrain I saw the problem, it was the terrain itself! With only a couple of sad, unpainted cardboard buildings, an assortment of craters and a small pile of green plastic crates, there wasn't a lot of variety.

At that (and with the onset of the holiday) I decided to make a river, and not just any river, a big river! In this post I will show you the relatively simple way to make a paper mache river.


For this project you will need:
-A sheet of thick cardboard or plywood
-Stickytape or glue
-Latex glue, clear drying varnish or PVA glue
-Flour
-Water
-Lots of scrap paper!
-Paint (and related accessories)

1- First of all you need a base. For anything about 12 inches long I find thick cardboard does the job fine, however I'm making my river in 4 foot and 2 foot lengths, (this way you could choose to have a river running parallel to either table edge) so I used 3mm thick plywood (in hindsight, it would have been better if it were a little thicker). On your base you need to draw the general shape of the river banks.
-Cut a sheet of thick cardboard to the shape of each bank and stick it to the base. It is not important for the cardboard to be firmly stuck in place, as the paper mache will secure it later.


-Now add another layer of cardboard, this one a little thinner than the last. You could continue adding cardboard for taller or steeper banks, but I think two layers is plenty. You now have the basic structure for your river.


2- There are many methods for making paper mache, and it really comes down to a matter of preference, I mix about 3 cups of flour to 4 or 5 cups of water (with about 3 tablespoons of salt to try and prevent mold). If you boil the paper mache it will thicken up nicely, but I have recently read that unboiled mache is actually stronger. (Though I don't know whether this is actually true....)
Once the mache is ready it's time to put those skills you learned in kindergarten to good use! Tear the paper into strips, soak it in mache and place in on the base, remembering to overlap the edges of each strip.


-Once the first layer is finished it is best to wait for a couple of hours before applying the next layer. Continue until you have applied 3 or more layers, more layers = more strength.
 
     Half of the second layer done.


When applying pape mache to anything, chances are it will bend as it dries, and even with a plywood base the river was bending upwards terribly! Here are the ways we found to reduce and/or stop it from doing this:
*Apply the same amount of paper mache to the back (can still bend)
*Cut along the paper mache, flatten the terrain and fill the cracks with latex or rubbery glue.
*If the paper mache is only bending during warmer parts of the day, seal it with spray paint while it is flat (though this could result in moisture being trapped inside, promoting mould growth and essentially rotting it from the inside out)
*Smaller pieces of terrain based on thick enough cardboard will not bend if you only apply one layer of paper mache to them. This may work on larger projects, but there's no guarantees!


3- Once the paper mache is dry you can texturize the banks. Most people would use flock or specialised modeling sand for this job, however for the 'budget-aware' (like myself) I find sand or even dirt works fine - so long as you can find some that is fine enough for the job.
Texturizing is a simple enough process, you just need to spread your glue-of-choice thickly on the area, then apply sand.


-When using dirt to texturize a piece of terrain, I find that it rarely sticks completely at first. To avoid pieces of dirt coming off in your house I mix a lot of glue into water, then liberally brush it over the dirt while it is still drying.


4- There's the structure of the river completely finished - all that's left is paint. Now, I'm not the world's greatest painter, but for those that just want their models painted to a bearable, 'table-top' standard I'll show you how I painted mine.
First I base coated the river sections completely black, top and bottom, with spray paint. Then a liberal coat of green was applied to the banks. It's best to cover the banks and water with paper, along with anything else you don't want to become green!


-This was followed by spraying a far lighter green over the top, from about 15 - 30cm away in a random, 'splotchy' pattern.


-Next, heavily drybrush the banks a brownish colour of your choice. Also paint out from the banks a little to give the water something to run into.


-If you're like me and using dirt/sand you found on the ground for grass, then chances are some larger pebbles will have slipped into the mix. At this stage it would be a good idea to pick them out, painting them brown and drybrushing the immediate area brown as well. This also helps break up the solid green of the grass.


-Now use the same paint and mix it with water to make a wash. The paint has to be watered down a lot, taking on the appearance of muddy water.


-Spread the wash thickly over the banks and grass, very, very thickly - drown the thing! The wash generally will dry more clear than you think, and you may have to apply several layers of wash to get the desired effect. The aim here is to make the grass look less plastic-army-men-green, and more natural, and make the banks look muddier. Wipe off any excess paint with a paper towell.
 

-Once a couple of layers are dry it should look something like this:


5-To paint the water section, apply a coat of dark blue (or green, or brown, or whatever colour your water is going to be).


-Then, using a dark, similar colour, create a wash and paint over the first layer.....


...which should look something like this when dry:


-Once the wash is dry, paint along the banks with a lighter, slightly watered down colour. For the best effect use several layers, with the first layer starting close to the bank, painting other layers over the first and further in towards the centre of the river.


-You may want to finish off the shallow water with a small strip of lighter colour close to the banks.


-A darker wash can be used to further blend the colours.


-Now for the finer details. A drybrush of much lighter brown on the banks, followed by small touches of white near the edges of the river and you can put away the paints.


-All that's left is to make the river look wet. For this you could use latex glue, clear-drying varnish or PVA glue. Though I can't stress enough, test it before you slop it all over your river! The brand of latex glue I used dried clear initially, however after a day it began clouding up, to the point where you could barely see the painted river underneath!


Well there you have it! That is how you scratch build a piece of river terrain. Note that this paper mache technique can be used to make pretty much any landscape you want - hills, lakes, craters, swamps, canyons, anything!

I hope you found this tutorial useful,
Happy scratch building,

40k Pirate


Thursday, July 12, 2012

Prepare to be boarded!

Avast! Load the cannons, sharpen yer blade and prepare to be boarded! The green scourge be comin! Aye, it be true, our latest update includes a brand new race, the barbaric 'Green-skins'! But that be not all, there be new proxies fer almost all other races - including flyers for Star Marines and Killer Robots, and two super heavy tanks for the Galactic Guard!

So enjoy the latest addition to our treasure trove!

Happy gaming,

40k Pirate

Saturday, May 12, 2012

How to Scratch Build a Chimera

Ahoy!

In this post I will show you how to make a Chimera Armoured Transport.

This is what I'm aiming for. This particular Chimera was scratch built from paper by the original creator of the template on http://www.bile40k.cjb.net (Unfortunately this website no longer exists). A pretty high standard, but worth a shot.

(Note: Since this tutorial was written, the general details and back 'structure' of the Chimera have been revisited. Please see this post if you're interested in adding a little extra detail to your Chimera).


For this project you will need:
-PaperHammer 40k.rar (Credit to the Golden Bolter Society)
-Paper and/or cardboard (about cereal box thickness)
-Scissors
-Paper glue (super glue is a good alternate for the less patient among us and dries very, very strong)
-Straight objects such as match sticks, tooth picks, lollipop sticks, ect.

1- Open PaperHammer 40k.rar
*Navigate to PaperHammer 40k/Imperial Guard\Chimera.
*Print Chimera - Parts.pdf on the thickest paper your printer can handle.


2- We will start with the Chimera's left track on page 1. First, cut out 1 and 2. (I also backed these on cereal boxes for added strength)


-Then cut out the small windows on 2.


-Cut out 3, then fold the tabs down, away from you so that the black lines are still visible. Join the smaller side tabs to create a triangular shape.


-Glue the hollow side onto the back of 2 behind the windows.


-Cut out 4a and fold it down, away from you. This goes around the bottom and back of either 1 or 2 (as you can see, I glued it to the back of 2).


-Cut out 4b and fold like 4a. This goes along the top and front of the Chimera track and joins with 4a.


-Now close the gap with the other piece (for me this was piece 1) and you should have the basic shape of a Chimera track.

-You've got your basic shape, but now it's time to add some detail. Cut out the structure below 1 and 2 and stick it to the track as shown. (I stuck the structure to cereal box cardboard for added thickness)


-For the 'box' on the side, cut out 7a and fold the tabs down, away from you. Stick this along the dotted lines at the top of the track.


-The bottom of the 'box' is a little trickier. Cut out 7b. Fold the small triangle on the end upward, towards you.


-Working your way from left to right, fold the next two tabs down, opposite to the way you folded the first tab.


-Now continue and fold the next two tabs upward.


-Fold the next tab upward and the last two down. Then stick 7b along the dotted lines at the bottom of the 'box'.


-To finish it off close the gap with 8, then glue on the structure. Depending on your scratch building skills, you may need to trim the outside edges a bit.


-The only thing our track is missing now is the tracks themselves! In my opinion this is the most time intensive part of the whole project, but if done right it can look really good. First you need to cut out the larger rectangles, and glue each individual one in the dotted lines.

-Now cut out the smaller rectangles and use them to bridge the gaps between the larger rectangles.

3- Repeat for the right track. (You may want to mark the finished track so you don't get the left and right tracks confused later on)

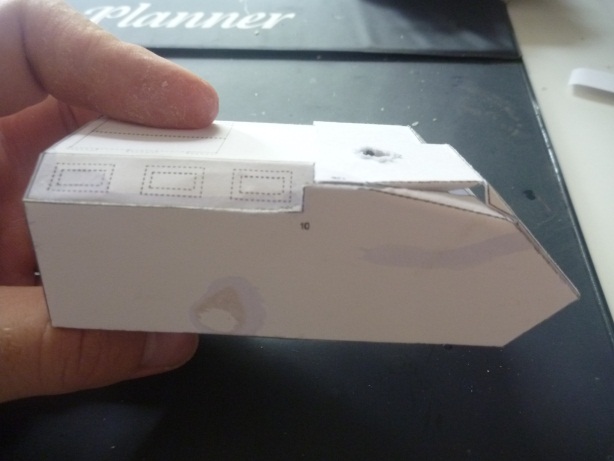
4- Next we'll make the turret and heavy bolter. Cut out the piece near the bottom left of page 3 (assuming you are holding it landscape, and the right way up!). This is the main turret piece. Fold the two largest tabs down so they are parallel to each other.


-Now fold the arms around to close the gap.


-Cut out the hatch and structure. This can be found next to the main turrent piece. Glue it to the turret as shown.

-Cut out this piece.......


.......and glue it to the turret.


-There is no template for the multilaser, you could however scratch build it out of paper tubes or other tube-like material. (For example- a chop-stick!) We will now move on to the heavy bolter. On page 3 it is next to the main turret piece, cut it out and fold the tabs down, away from you.


-By folding the larger tabs down, and closing the gaps with the smaller tabs it will create a triangular/pyramid shape.

-Use one of the small rectangles left over from the hatch on the main turret piece and glue it to the top of the bolter as a sight. You can make a barrel by rolling a piece of paper into a cylinder. (I forgot to take a picture of the WIP barrel)


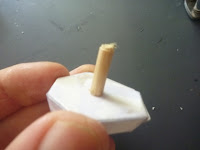
-I have decided to give this Chimera moveable and removable weapons, this way weapon destroyed results can be easily recorded. To do this I am simply going to glue a stick to the bottom of the turret and heavy bolter, and cut a slot in the Chimera where they should go.

5- We've got the turret and heavy bolter, now we need something to attach them to. Cut out 12a and 12b. 12a is the bottom of the Chimera. Fold the tabs down as usual, then turn it upside down. (I glued cardboard in the middle for added support)


-Cut out 12b, this is the top of the Chimera. Cut along this line on each side:


-Then fold down.


-Now glue the back tabs (the rightmost tabs in the above photo) on to the back of 12a.


-On the front of 12b cut all the way along this line and fold down.


-This is a convenient time to add holes where you want your turret and heavy bolter. (I forgot to add the heavy bolter slot at this point, doing it later on instead)


-Now join these two tabs to the front of 12a.


-If all has went well, you should end up with something like this:
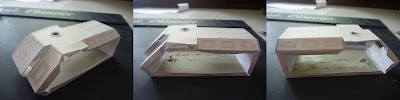


-To complete the main structure of the body you need to cut out 10 and 11. (I backed these on cereal box for extra strength) These go on the sides to close the gap. (10 goes on the Chimera's right side, 11 on it's left) On each you also need to fold the triangles down, this covers the gap between the covering piece and main body.


-You may be left with a gap like this:


-To cover this gap, cut out the triangles located next to 12b on page 3. One of these will fit snugly into the gap. (There is one for each side)


-You may also be left with gaps like these. There is no template provided to cover these gaps, but it is easy enough to trim a piece of paper to the appropriate size.


6- We've built the main hull, now to add detail! Cut out this piece (including the inside):


-Glue it around the heavy bolter spot (I had a little trouble with my piece self destructing)


-You will need to cover this gap.


-Now we will do the front structure. Cut out this:


-And stick it to the front as pictured.


-Then cut out the pieces that can be found below the front section of 12b and glue to the front of the hull as pictured.
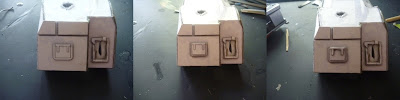

-That's the basic front detailing finished. We will now do the middle. Cut out the 'top doors' (remembering to cut out the small middle strip) and the windows:


-And glue them onto the top side of the Chimera as pictured:


-Finally we have the back structure. On page 3 it is next to 12a on the left (assuming you are holding the sheet landscape). Cut it out and glue it in the dotted lines.
(Note: Since writing this tutorial the general details and back 'structure' of the Chimera have been revisited. Please see this post if you're interested in adding a little extra detail to your Chimera).


-Cut out the two shapes in the top left of page 3.


-Fold the tabs down, away from you. This should result in you folding the template around the far right tabs, giving you a rectangle with one sloped end.
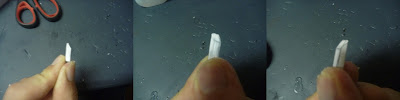

-Then glue these on to the back of the Chimera and the main body is fully completed!


7- Now it's time to put all the pieces together, glue your tracks onto the Chimera's main body. This can be a little tricky to get just right (I think mine is definitely a little off).
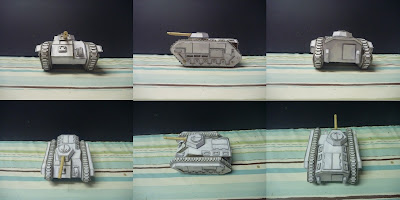

8- Lastly, our Chimera is still lacking in one thing. Colour! But we can fix that!
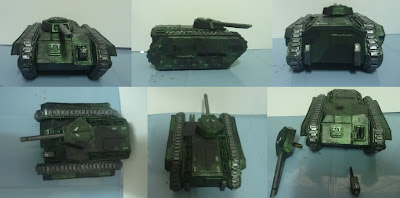


And viola! that is how to scratch build a Chimera!


Looking back, there are some things which I could have done better, (the 'box' on the side for example. I just couldn't get it into quite the right shape!) but I'm pretty pleased with how this one turned out. I personally think that the posable and removable weapons are very cool! All my other scratch built vehicles have their weapons glued in place, and to me it just seemed wrong that they couldn't rotate. I'm also very impressed with the new metallic paints! I'm very new when it comes to painting and this paint just blew me away! (All this time I thought people were using some seriously complicated painting technique to achieve that metallic effect, turns out the secret is in the paint!) Now that I've got these new paints I may have to go back and redo my Broadside....


I hope you found this tutorial helpful,
Happy scratch building,


40k Pirate


All associated marks, names, races, race insignia, characters, vehicles, locations, units, illustrations and images from the Warhammer 40,000 universe are either ®, TM and/or © Copyright Games Workshop Ltd 2000-2012, variably registered in the UK and other countries around the world. Used without permission. No challenge to their status intended. All Rights Reserved to their respective owners.